Affinity Software

Since Adobe’s move to subscription based software, I have stopped updating my Creative Suite. I had purchased CS3, and CS5. I was planning on getting CS6 or 7 when it came out, however after the release of CS6, Adobe axed the purchasable software and moved exclusively to the subscription model. Subscription makes sense in many settings (mostly professional). People who use the software daily for business, or people who have to continuously be using the most recent release can easily justify the cost. Paying the monthly sum is more affordable than paying the full purchase price and upgrading every year, or even every two years.

For me, CS5 was good enough that I was able to use it for a long time even though I knew that time was coming to an end. Each new release of Mac OS X was breaking features. WYSIWYG fonts broke around 10.7, using the color picker on raster images caused crashes around 10.8. I was willing to hobble along because the core functionality I required was there, and in all respects, and it generally worked very well.

Well, mostly well enough…

Over the years, I’ve looked for alternative programs. I looked at Sketch and Inkscape to replace Illustrator. I’ll be completely honest. I can’t stand InkScape. I appreciate that it is opensource, and applaud the amazing work that’s been put into it. I keep it installed and I resort to it from time to time because it works really well with SVGs, and it is also very scriptable which is a wonderful feature for some of my automated tasks. But when it comes to using it daily, I just can’t. The interface is too different from what I am habituated, and it’s not pretty or polished. For a long time it required X Windows/X Quartz to be installed, and didn’t present an integrated experience with the rest of the Mac.

To replace Photoshop, I purchased Pixelmator. It’s a great little program, and I really wanted to like it. It has a great OS X interface and is smooth and polished. I purchased it ages ago before giving up CS5 knowing that someday it would be inevitable. My goal was to use Pixelmator when my work called for photo editing, and not resort to Photoshop. Unfortunately, the workflow was sufficiently different from what I was accustomed that most of the time I ended up back in Photoshop. The differences in approach to UI caused just enough friction that I never used it enough to become proficient.

As for InDesign, I didn’t really have any affordable options that fit the bill. I have QuarkXpress, but don’t love it.

Finally a few years ago, I saw Affinity Photo being advertised at a reasonable price, and so I bought it and gave it a shot. (At this point Affinity Designer was on the cusp of being released). Affinity Photo felt much more familiar to me than Pixelmator off the bat. I found that I could slip right in and keep using it the way I was using Photoshop. Some of Affinity Photo’s idioms perplex me. At times I need to do some searching in order to complete a task that I could have done instantly in Photoshop. Aside from these little learning issues, it’s really pretty dang good. The differences that annoy me on the onset make sense once I see how they intended for the user to do that task.

My primary use case for Affinity Photo is doing photo touch ups and alterations. Usually this will involve multiple layers with masks, lens correction, and airbrushing/healing tools as well as the adjustment layers for color correction.

Since I had a positive experience with Affinity Photo, I decided to buy Affinity Designer sight-unseen. I was sold on it immediately. It too has some quirks, and I am still learning new things about it as I go, but for the most part, it’s been a great tool for everything I’ve needed it for. About a year ago I upgraded to Mojave and I did not bring CS5 with me. All of my professional work has been using Affinity Designer, and it’s been really great.


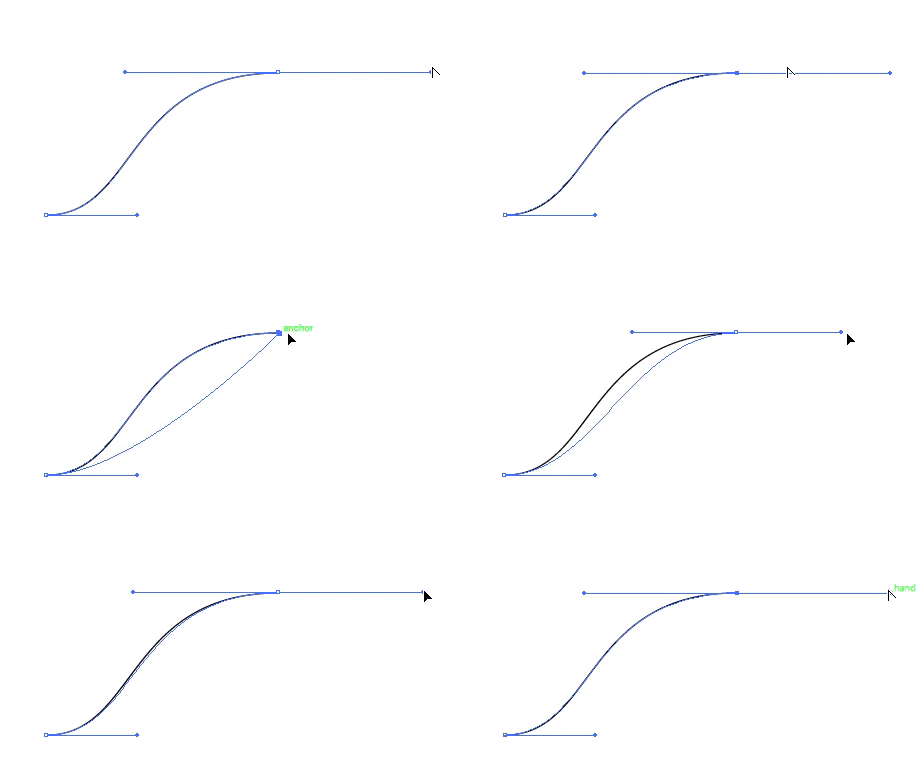
Adobe Illustrator Bezier Tool
Affinity Designer Bezier Tool

One of the great things about Affinity Designer that made me love it right away was the responsiveness. With Adobe Illustrator, when manipulating the handle of a bezier curve, a cyan colored outline of the curve will animate, but the actual curve you draw won’t present itself until you let go of the handle. I was so used to this being the case, that I never thought about it. In Affinity, the shapes animate in real time, which I think is fantastic.

The first task I used it for was creating an icon for an internal tool I was developing at work. The learning curve was not very steep and by the time I finished this icon, I felt pretty comfortable already.

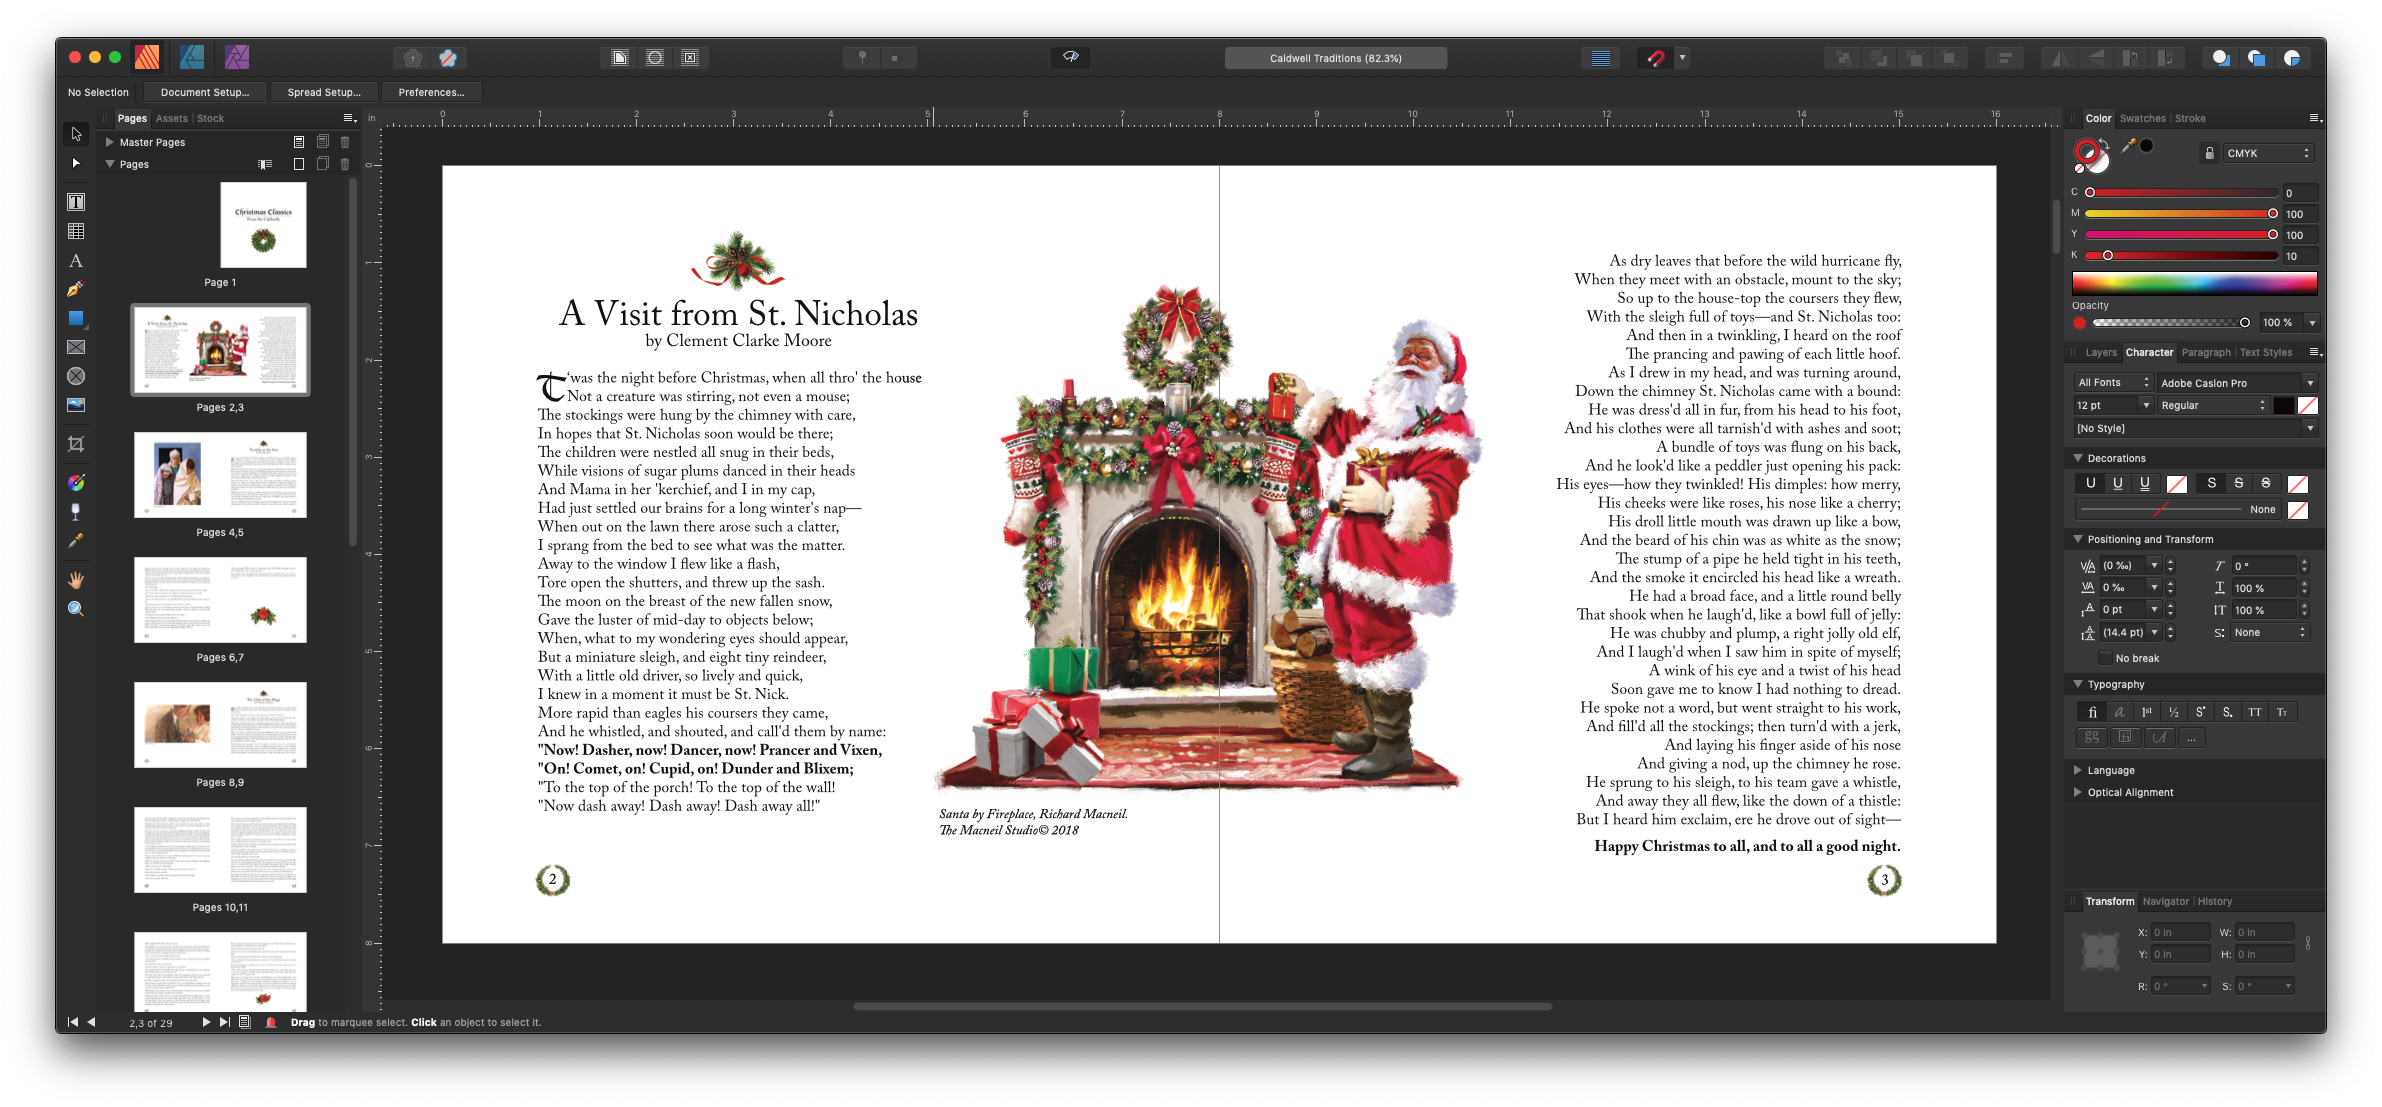
The last piece of the puzzle was a publishing program to replace InDesign. I had a small book that I was working on with my sister, and thought that this would be a good opportunity to test out Affinity Publisher. It was in beta at the time, so I downloaded the beta and got straight to work.

Everything was going pretty well until I got the text for whole book roughly laid out, sans-graphics. I began throwing in graphics, saved it and exited. I revisited it the next day, and was unable to open my file! I checked the forums, and it turned out to be a known-issue relating to placing graphics on a page-master. A new Beta had already been released which resolved the issue. I was so relieved when I was able to open that file. That was the only issue I’ve encountered with Affinity Publisher.

I worked with my sister and finalized the design, exported it, and sent it for printing. We got the prints back, and everything looked perfect.

These three tools from Affinity integrate with each other really well, and I’ve been extremely happy with the value of the products, the features, the stability, and the polished interfaces. They feel cohesive as a product family, and they feel very at home on my Mac. I really can’t recommend these products enough.

Wile E. Coyote

Wile E. Coyote was a large part of my childhood. His cartoons were my favorite of all the Looney Tunes. I love his determination at catching the Road-Runner. I love his inexhaustible budget for all things ACME. I love the complexity of his Rube Goldberg-like plans. I love the absurdity of his failures.

One of my favorite episodes is “Beep, Beep” from 1958. In this one, Coyote employs blueprints to aid in his preparations against Road-Runner. I think of the blueprints as quintessential coyote-ness, however after a careful rewatch of all the shorts I have access to, he only uses blueprints in this episode and “Operation Rabbit.”

At any rate, the blueprints from this episode make me smile, and I thought printing the blueprints out would be a nice thing for a shop wall or for other family member who also have a fondness for the determined coyote.

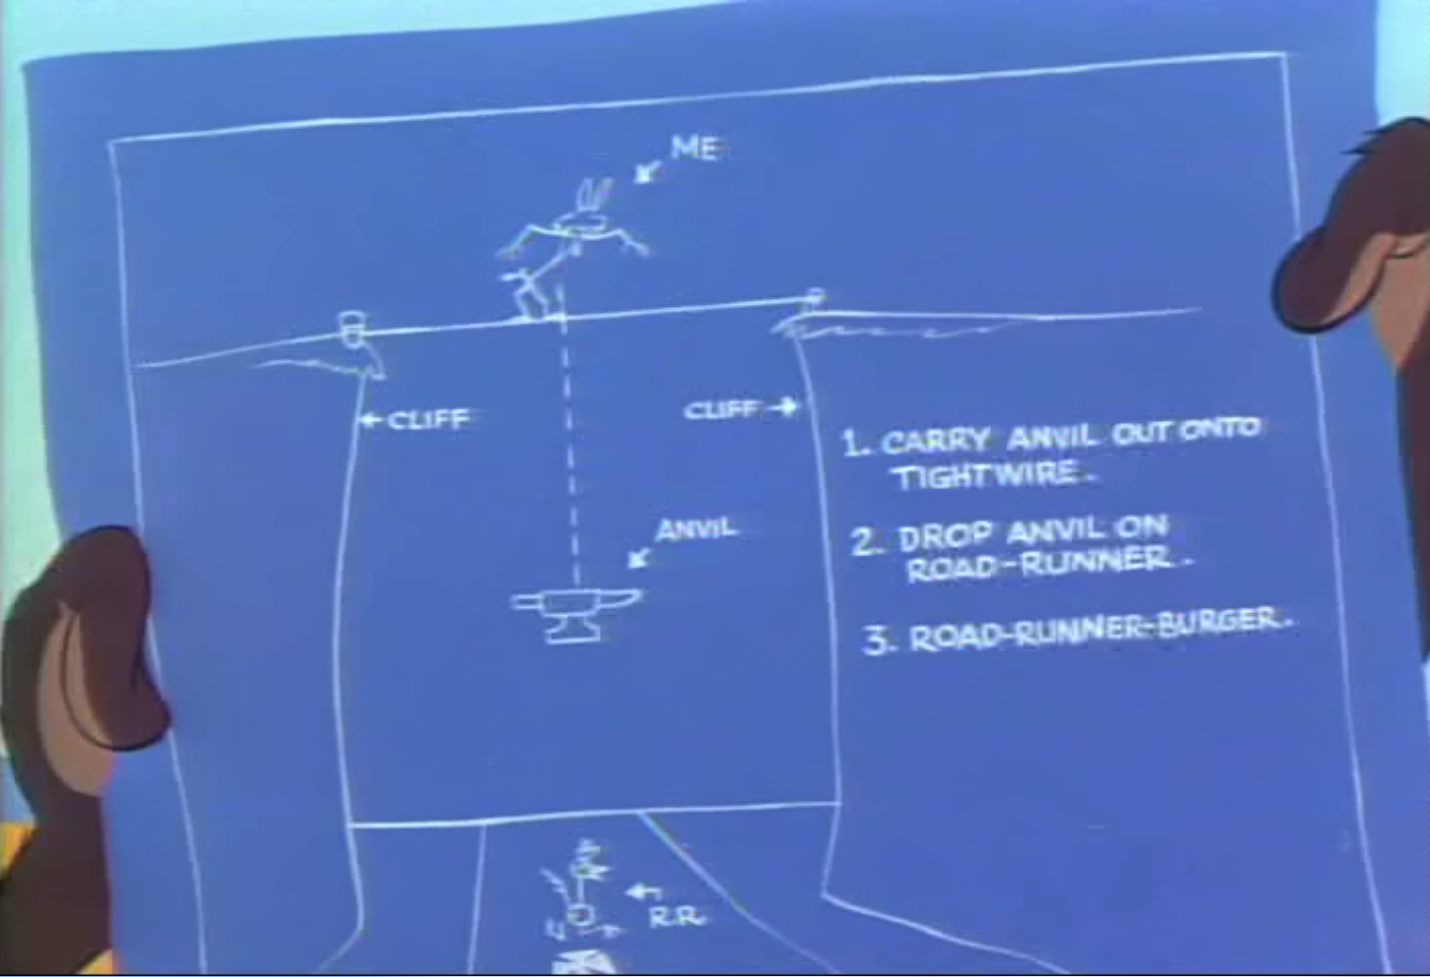
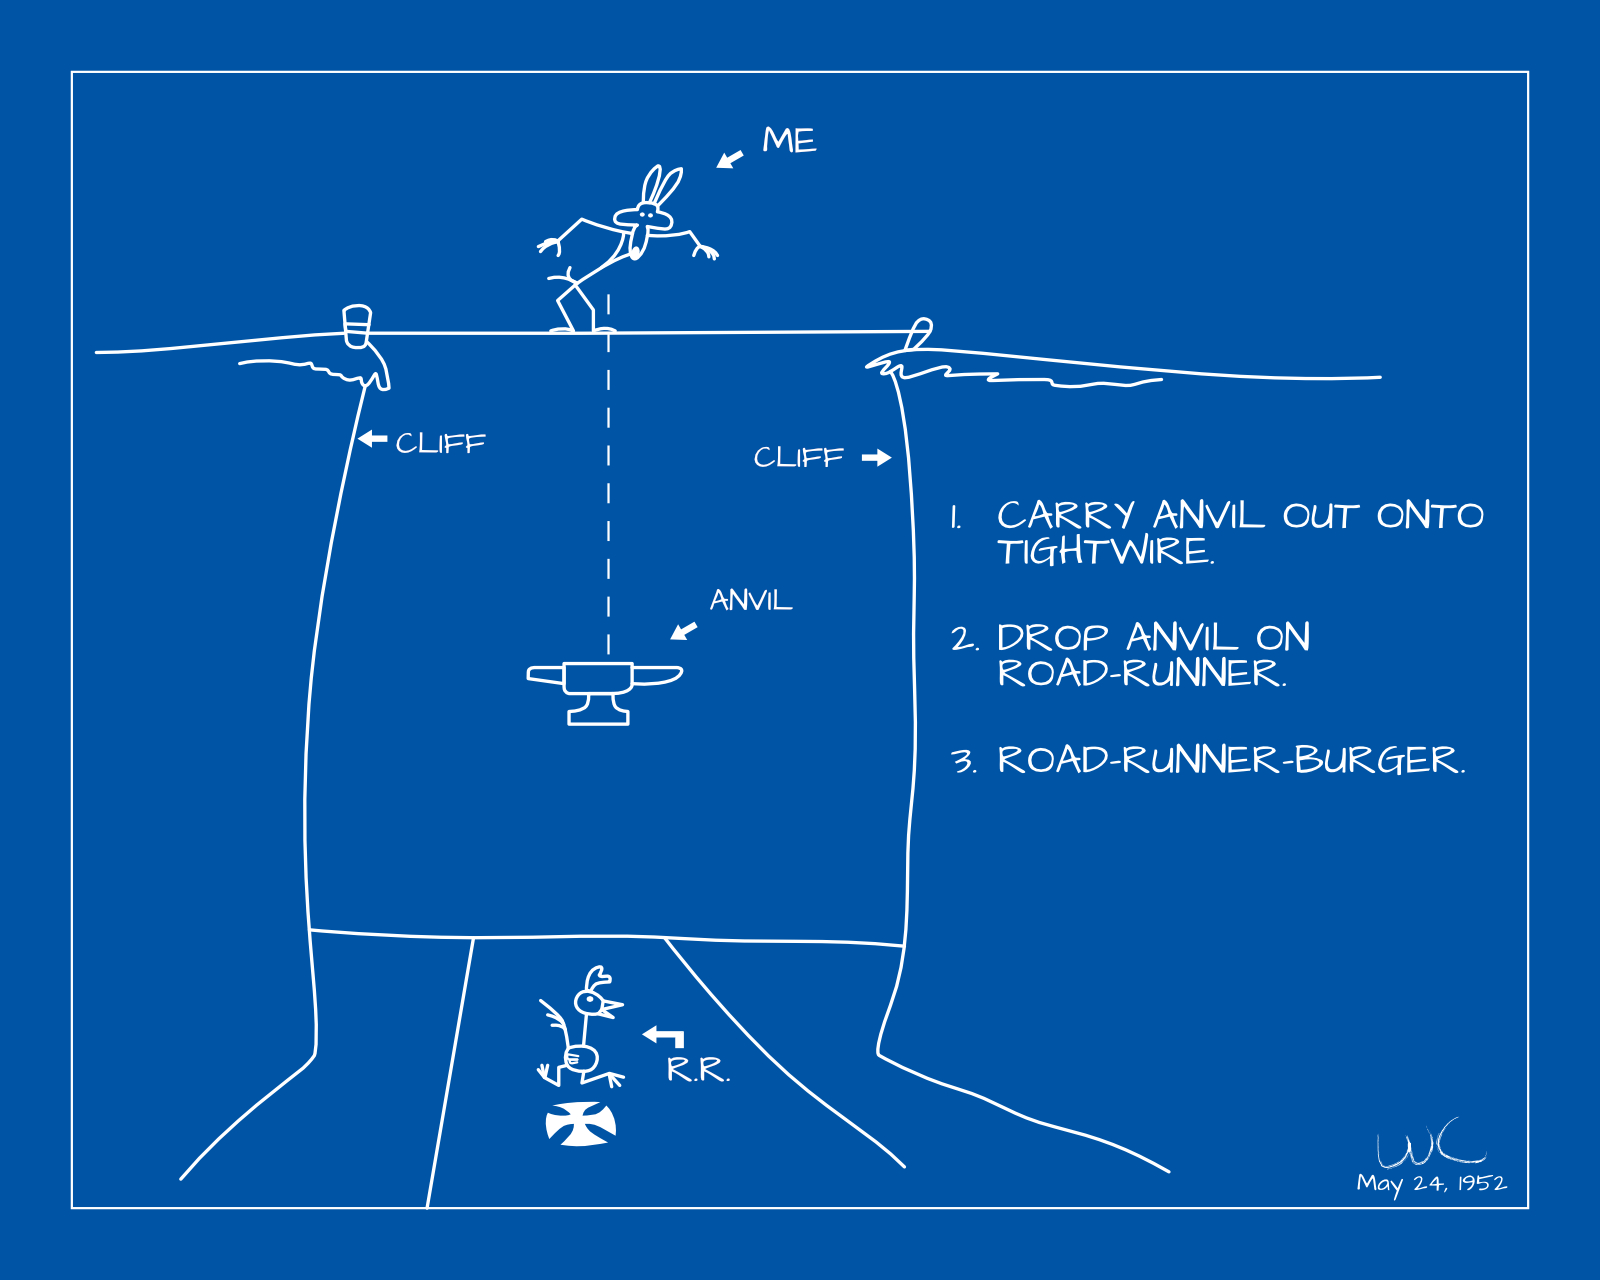
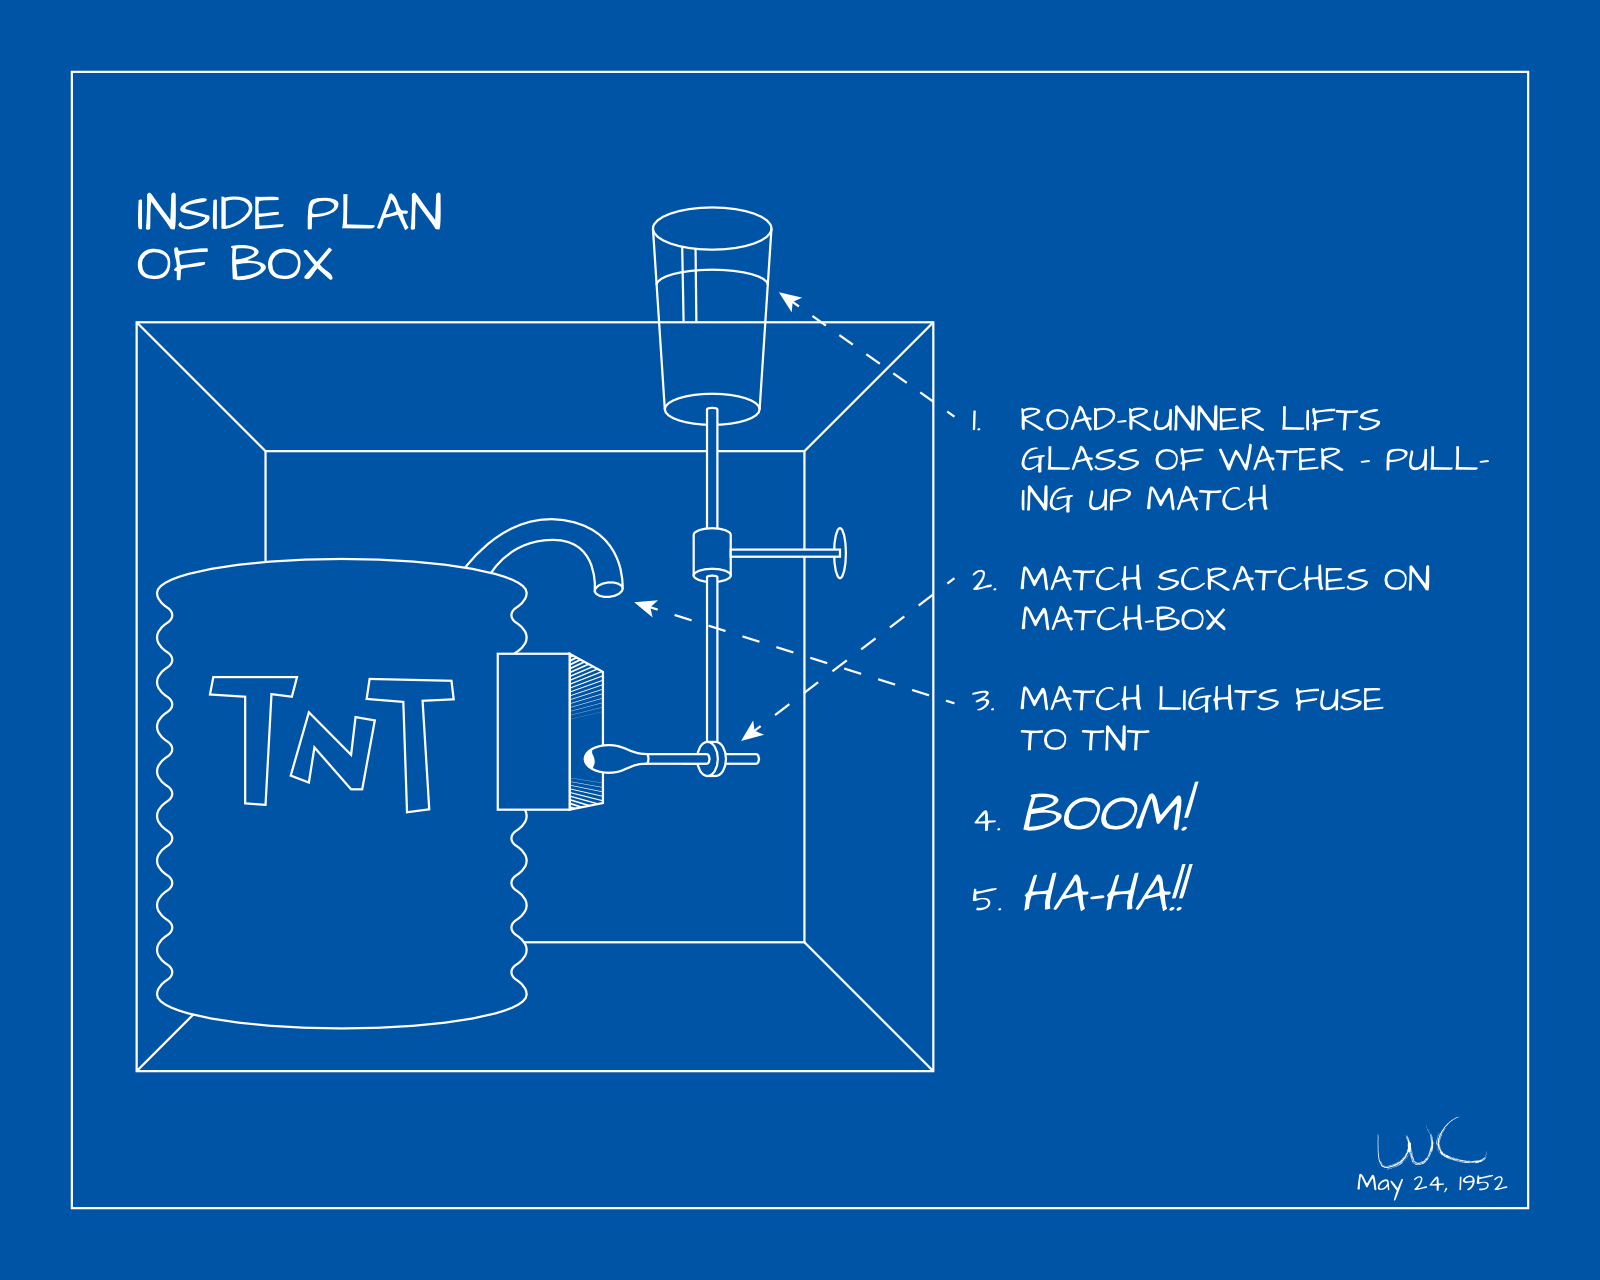
I screen-grabbed some shots off of a Laser Disc compilation of Road Runner shorts and redrew them using Affinity Designer. I tried to be true to the source material so that the images would be clearly recognizable. I took some liberties by straightening some lines, using a font instead of hand written letters, etc., and I am pleased with the results.

Screen capture from Laser Disc

In this first scene, Wile E. Coyote plans to drop an anvil onto an unsuspecting Road-Runner from a tight-wire strung across a gorge.

Screen capture from Laser Disc

In this second scene, a box is rigged to explode when the water glass is lifted. One of the things I love about the box is that even though it is introduced near the beginning of the episode, the payoff comes at the end after the viewer has probably assumed the gag was over and not going to be revisited.

While, I don’t want him to hurt the Road-Runner, I do feel a sense of pity for him and all the pain he has to endure for the audience’s enjoyment.


Emacs Notes

Emacs is a very feature-laden editor. As such, it can be hard to remember all of the various features that are very useful, but perhaps, not frequently used. I thought I would create a list of some features I have learned and did not want to forget.

Show a list of all currently opened buffers

C-x C-b

When there are dozens of buffers open, it can be difficult to switch to the correct one. This command will list them all, and allow you to go directly to the buffer you wish to edit.

Display current function name

M-x which-function-mode

This will add the name of the function that the cursor is currently in to the status bar at the bottom of the page. I have found this pretty useful when exploring unknown code, or long documents with hundreds of functions. I don’t enable this all the time though because I have found it can sow the responsiveness in larger documents.

Show invisible characters

M-x whitespace-mode

Sometimes its nice to see if a document is using spaces or tabs. Enabling white-space mode makes it clear the type of indentation being used, as well as making other whitespace sins apparent. This is particularly useful when you work on a file that’s been passed around multiple editors and is not consistently indented.

Along with this, you can easily remove whitespace present on the end of the lines by selection a region and using the following command:

M-x delete-trailing-whitespace

Easy alignment

M-x align-regexp

This is actually a command I do use frequently. I like to have things lined up as I feel that it improves legibility. This command, when run on selected text, will align the text to the matching user input. For example, I can use this to align multiple lines on an equal sign.

Selection, Etc.

C-x space

Mark. This begins a selection by marking where you cursor is and highlight to where you move your cursor thereafter

M-w

Copy. This will copy the marked region

C-w

Cut. This will cut the marked region

C-y

Yank. This will paste the kill buffer contents at the location of the cursor

Rectangular Commands

C-x r k

Rectangular cut/kill. Make a selection across multiple lines, then run this command. It will kill the rectangular region of text that was selected

C-x r y

Rectangular yank/paste. This command will paste the rectangular area of text killed by the command above.

C-x r t

Make a selection across multiple lines, then run this command. As you type, it will insert the text on each line you selected in the column that you began/ended with. If you start and end in different columns, it will replace the text in those columns on each line.

Navigational Hot Keys

Moving within the buffer can be tedious without some hotkeys to speed things up.

M->

Go to end of document

M-<

Go to beginning of document

M-g M-g

This brings up the ‘goto line’ prompt for quickly going to a specific line

M-g tab

Similarly, this brings up the ‘move to column’ prompt

C-v

Page down

M-v

Page up

C-l

Center cursor/cursor position in window

C-s

Search for term. Use the combination repeatedly to find the next instance of the search term

C-r

Search in reverse. As with the previous command, repeatedly using the combination will take you to previous instances of the search term.

Formatting Hotkeys

M-c

Make word capitalized from cursor position to end of word

M-l

Make word lowercase from cursor position to end of word

M-u

Make word uppercase from cursor position to end of word

Window Navigation

C-x 1

Return to single view

C-x 2

Split pane horizontally

C-x 3

Split pane vertically

C-x o

Move cursor to other pane/view

C-x left

Switch buffer to preceding buffer

C-x right

Switch buffer to next buffer

File Handling

C-x C-f

Find a file to open/edit

/ssh:user@ipaddress:/path/to/file/on/remote/machine

Also of note, when opening a file, you can use the above syntax to open a file on a remote machine.

C-x k

Kill buffer (close file)

C-x C-q

If a file is write protected, but you want to edit the buffer anyway…

Keyboard Macros

Keyboard macros allow you to create a set of commands that you can repeat in order to speed up repetitive tasks.

F3

This will begin your macro recording. Every keystroke and command until you do will be recorded until you stop recording

F4

This will stop the macro recording. Once you have stopped recording, every time you press F4 it will repeat your whole macro.

mg; The Emacs Like Editor

Sometimes you don’t want to install an 80 MB text editor on your machine. Sometimes you want something lightweight, but just don’t want to use ‘vim’. For those times, you have ‘mg’ (micro gnu). It’s a very small binary (200k on my current install) that gives a similar experience to Emacs. It has the familiar interface, keybindings and most of the essential features. Obviously the exotic commands are missing, but the fundamentals are there. I’d much rather be stuck using this than vim, vi, or nano.

Closing thoughts

While not a comprehensive list, these are some of the commands I wish I had known when starting out with Emacs. There are so many, and while I like Emacs a lot, my main gripe with it is the lack of discoverability with commands. As a last tip, the following command will show you all of the available key shortcuts:

C-h b

Happy editing!


© 2007-2015 Michael Caldwell