Crafting A Souvenir for Adam Savage

From Mythbusters to YouTube, I’ve always enjoyed watching Adam Savage and his various exploits. He has an enthusiasm that is contagious. I learned about a month ago that he would be visiting Fan-X in Salt Lake City, and I thought it would be a fun opportunity to meet him in person.

I wanted to make something for him in order to make the experience hopefully memorable to both parties. About 5 years ago, he had a whole series of videos where he made the Samaritan gun from the movie Hellboy. It was something that was clearly very meaningful for him. I thought perhaps I could make an accessory to accompany that prop. I also wanted it to be a bit different enough that it would be something no one else would think to create.

I decided to make a tiny Samaritan gun housed within a full-sized bullet for the Samaritan. I think it’s kind of random, but has a good chance of being something Adam would find humorous.

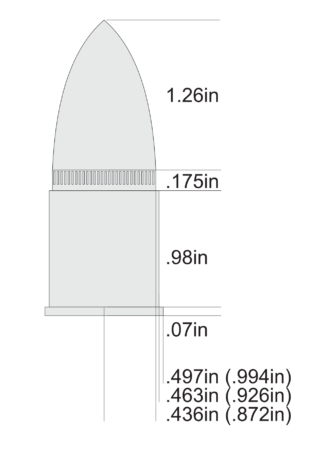
Firstly, I needed plans. I had a hard time finding any explicit dimensions for the bullets. I know they are 22mm, and typically when referring to a round, the measure is applied to the projectile, and not the casing. With that in mind, I found a photo of a screen-used prop and made some measurements based off of the one known dimension.
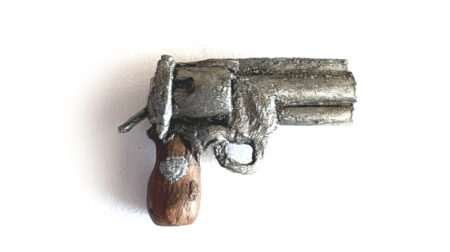
The next step was creating a tiny gun. I was going to 3d print this, but I didn’t know anyone with a working SLA printer, and apparently you many online printing services won’t allow you to print anything gun-shaped (even if it’s less than an inch big)! I ended up sculpting it out of clay and painting it. It was fun to try to get it to be recognizable even without the ability to add as much detail as I was wanting in my head. In the end, I liked the result and it felt more heartfelt than just printing something.
The next step was turning some brass to be the casing. I used my mini-lathe and some 1″ brass bar stock. This was straight forward.

Once I had the casing, I could then create the buck for the bullet. I used some poplar dowel and turned it, shaping it by hand. I filled the wood and sanded, painted, repeat until it was as smooth as I could get.

I used the buck to create a mold. I tried 2 part molding putty, but it was not very successful. I ended up with some weird voids and bubbles. I purchased some silicone mould maker and it was very effective. I ended up with zero voids, and it had a real nice finish.

Last I needed to cast the resin bullet. Thankfully I was smart enough to test this before committing my tiny gun. The first time, I didn’t follow the instructions. I ended up with lots of bubbles and some soft spots. The second time, I followed the instruction which indicated to heat the 2 resin parts prior to mixing. This improved the flow and reduced the number of bubbles.
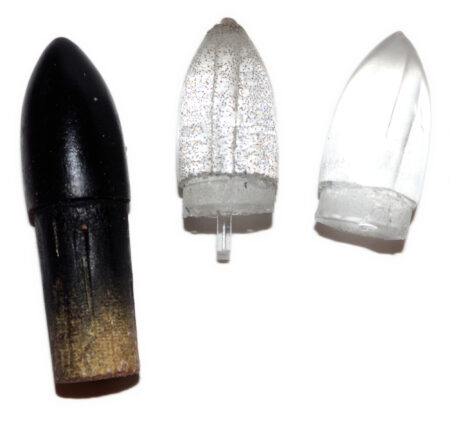
It still wasn’t what I hoped for, so the final step was to use my brother-in-law’s vacuum chamber to vacuum out the bubbles after mixing, but before pouring. I suspended the gun in the mold using acrylic rod and a jig. I let it cure, and was very happy with the result. After polishing and clear coating, it looked as good as I could have hoped for.
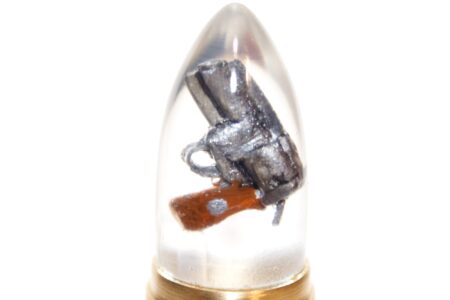
The next step was to meet Adam and give it to him. I’ve never been to a con before, so I didn’t know what to expect. I purchased a photo op beforehand thinking that would be the best way to meet him. I arrived about an hour before my appointment to look around, and figure out what the line situation was. I saw Adam at his table, but was afraid to approach as it seemed it was necessary to pay to either get an autograph or to take a selfie. Neither seemed appropriate since I was going to get a photo in just an hour, so I didn’t approach.
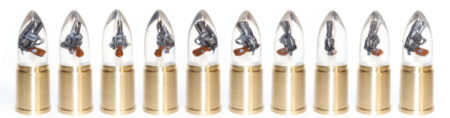
The photo-op experience was not what I was expecting. They funneled us into a big line, and they had us going in, getting a photo, and leaving all within seconds. I was able to say “Nice to meet you”, and then they snapped a photo, and I barely had time to say “May I give you a gift?” Adam was nice, and took it but didn’t have time to open it then. I was funneled out as quickly as I had come in. Apparently this is the nature of these photo-ops, and being a con-newbie, I had no idea.
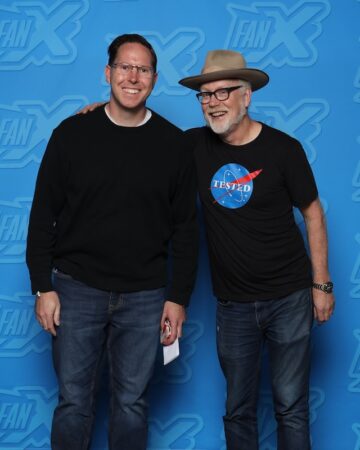
(You can see the gift in my hand)

I was glad to have met him. I hope he is able to open the gift and appreciate it. He seemed like a lovely person. I hope someday I get to actually have a conversation with him.
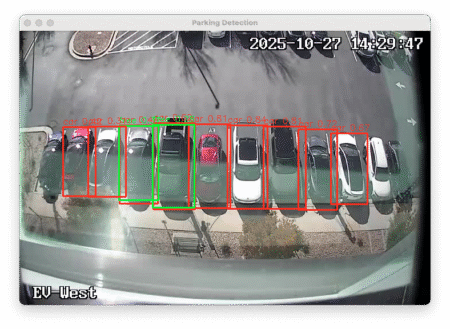
EV Charging Stalls Vision Recognition

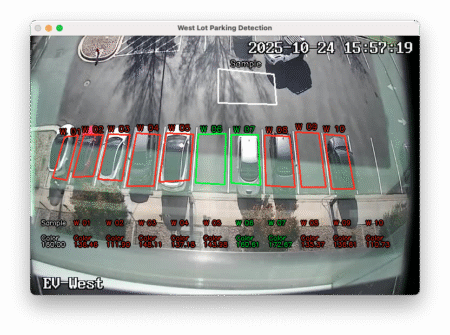
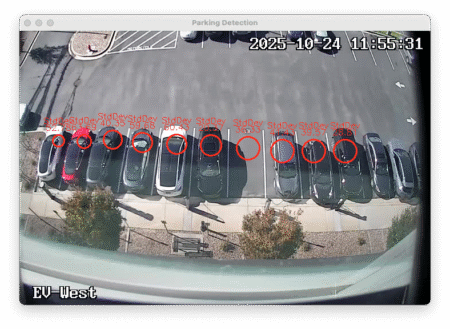
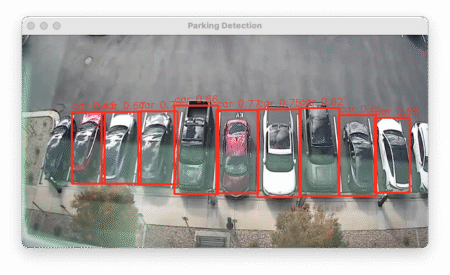
At the office, we have 12 parking stalls that provide free charging for electric vehicles. This is a nice perk, but unfortunately, there are a lot of EV owners. Finding a parking stall can be very difficult! Someone has thought of this, and very kindly placed cameras looking down on the stalls from the 4th floor so that those interested can see if any chargers are available without leaving the comfort of their desk.

I find having to check the cameras to be a bit of a burden though, so I thought it would be a good excuse to learn a bit more about computer vision by writing a small program to detect open stalls automatically, and notify me. I’ve never really done much in this area and thought it would be interesting.

Machine Learning

Using some sort of LLM seemed like the most obvious approach. I used the ultralytics library in Python and tried it’s built model which didn’t do great.

I thought a more tailor-made model would perform better. I looked on roboflow for models that were trained on aerial photography of parking lots. I uploaded a screenshot to multiple models and found the one with the best performance.

The model seemed to do pretty well, however it was having troubles detecting cars on the very edges. I suspect this is because of the skewed geometry from the lens distortion, but I’m not really sure. I also had a lot of overlapping results and false positive and false negatives.

I tried optimizing it using a few different methods. I tried cropping the image down to the bare minimum so that there was less to distract the LLM when looking for predictions. This didn’t help the edge stalls in being detected.

I also tried cropping each stall individually and running the model on each independently. This made results even worse! I was now getting a lot of false positives on the parking stripes and false negatives on cars. No effect on the far left stall either.

I left it running and started saving screenshots periodically as well as what the predictions are. During this time, I captured 141 images and predictions. Of those, 52 were not accurate predictions.

Accuracy: 63%

That was a lower accuracy than I was hoping for. I had a couple ideas on how to move from here. One is to collect images for a long enough time to train my own model. Ideally, I’d want to do this after collecting samples for a year in order for all possible seasons and lighting conditions to be included.

The second idea is to go more low-tech, and look into traditional image analysis techniques.

Traditional Image Analysis

For doing image analysis I used the Python library, cv2 along with numpy.

Average Color Detection

One method is to take the average color for a sample area of asphalt and compare against the average color in each parking spot and see how different they are. This is an easy check to implement, but there are many way in which this can fail. For example: Shadows, wet asphalt, car driving through sample area, grey cars.

Unsurprisingly, this was a fairly abysmal result. It could probably be tuned a bit, but I don’t think it would ever be viable.

Accuracy: 25.78%

Pixel Brightness Uniformity

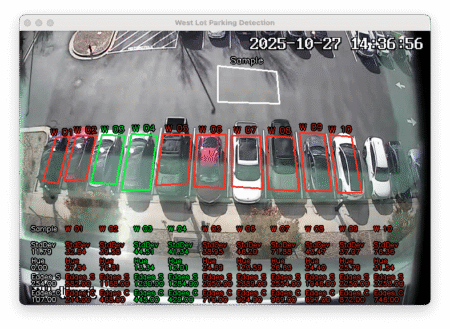
By looking at the pixel brightness and getting the standard deviation, we can see how uniform the pixels in an area are. Asphalt is fairly uniform, but a car with windows and paint, and glare are not very uniform. This is also pretty easy to implement, and works fairly well. This method also has similar pitfalls to the previous method; Shadows, wet asphalt, and cars that are low contrast colors.

Accuracy: 51.92%

Hue Uniformity

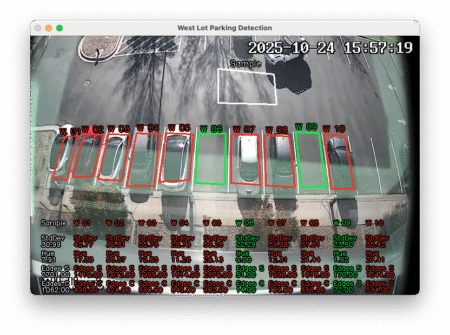
Another method is to look at the hue uniformity. My goal here was to eliminate the issue of shadows, this way a parking spot half in light and half in shadow would have a higher uniformity than a car which has features/windows etc. Similar issues apply here as well, such as dull-colored cars, bad lighting.

This ended up being a huge step backwards at only identifying 229 of my 630 images correctly.

Accuracy: 36.35%

Edge Detection

Rather than looking at color uniformity, or brightness uniformity, what if we looked for image uniformity by detecting edges? This is also easy to implement in Python using the cv2 library. After dialing in a threshold, the accuracy was astoundingly good. It’s particular weakness is where there are intricate shadows or splotchy textures from rain/water. False negatives are less likely than false positives.

Accuracy: 95.57%

Notifications

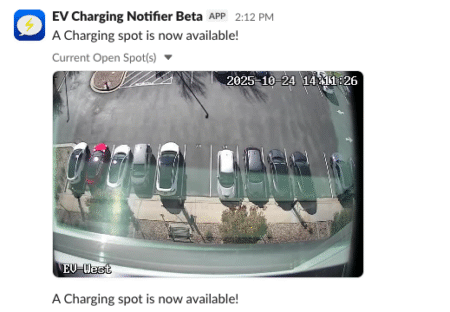
The final step was to create a Slackbot that would notify me when a parking spot becomes available. I had never done this before, so I followed a tutorial.

I limited my Python script to only send notifications on work days and during normal work hours. It also only notifies me when it goes from no spots available to 1 or more spots available.

Conclusion

The system is working well enough in it’s current state. I intend to revisit this project in a few months after we get into winter. I suspect that the current edge detection method will fail when we start having snow on cars. I am saving screenshots periodically in order to build up training data to attempt creating my own model for this particular problem. In the mean, I should be able to charge at work more often!

Cookie Crawl

Where we live, there is an abundance of bakeries that just sell cookies. I don’t get it as I’d rather just bake my own cookie at home. My wife however likes these oversized cookies and their many novelty flavors. For her birthday, I decided to take her and the family to many of these establishments in order to decide once and for all which was the superior cookie making establishment.

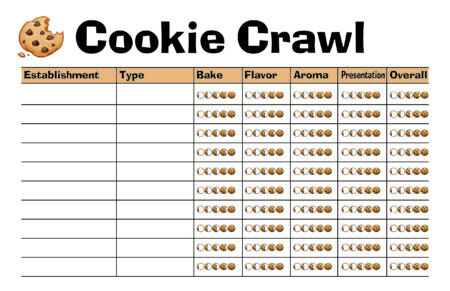
For this endeavor, I created a rubric for scoring each cookie based on flavor, aroma, bake, etc. You can find it here:

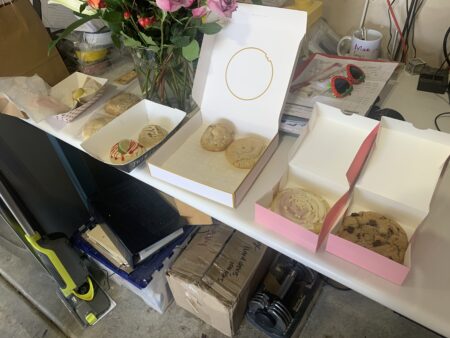
Each member of the family filled one out. We got 2 cookies from 5 different bakeries; 10 cookies to evaluate in total.

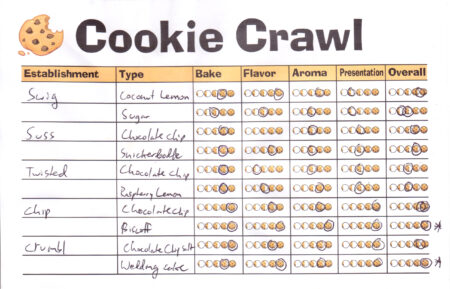
Here is the example of how I scored the different cookies:

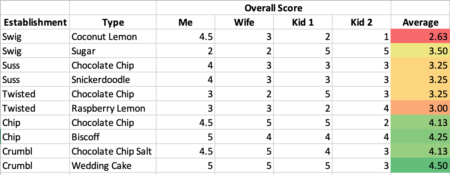
Here are the tabulated results for our quest (for those who bothered to fill out the rubric).

In the end, it was a fairly conclusive victory for Crumbl. In particular, the Wedding Cake cookie they were sporting this week was well regarded by all. The worst was Swig; in particular the Coconut Lemon was only liked by me.

Make of that what you will, but we had fun consuming far too many calories worth of cookies in one day!

© 2007-2015 Michael Caldwell