Crafting A Souvenir for Adam Savage

From Mythbusters to YouTube, I’ve always enjoyed watching Adam Savage and his various exploits. He has an enthusiasm that is contagious. I learned about a month ago that he would be visiting Fan-X in Salt Lake City, and I thought it would be a fun opportunity to meet him in person.

I wanted to make something for him in order to make the experience hopefully memorable to both parties. About 5 years ago, he had a whole series of videos where he made the Samaritan gun from the movie Hellboy. It was something that was clearly very meaningful for him. I thought perhaps I could make an accessory to accompany that prop. I also wanted it to be a bit different enough that it would be something no one else would think to create.

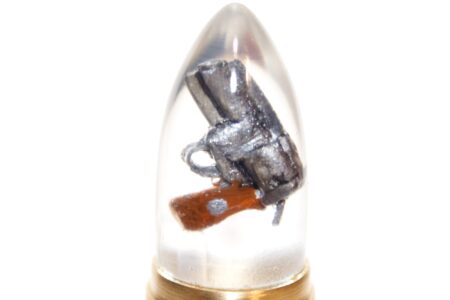
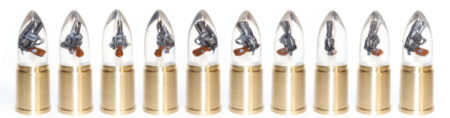
I decided to make a tiny Samaritan gun housed within a full-sized bullet for the Samaritan. I think it’s kind of random, but has a good chance of being something Adam would find humorous.

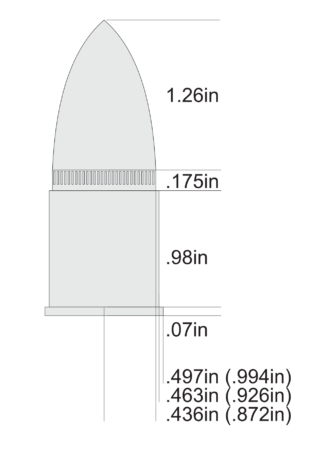
Firstly, I needed plans. I had a hard time finding any explicit dimensions for the bullets. I know they are 22mm, and typically when referring to a round, the measure is applied to the projectile, and not the casing. With that in mind, I found a photo of a screen-used prop and made some measurements based off of the one known dimension.
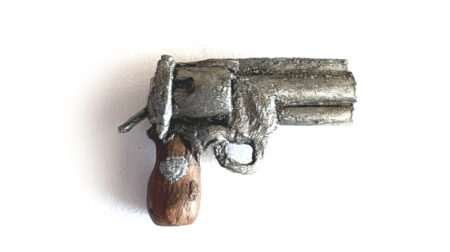
The next step was creating a tiny gun. I was going to 3d print this, but I didn’t know anyone with a working SLA printer, and apparently you many online printing services won’t allow you to print anything gun-shaped (even if it’s less than an inch big)! I ended up sculpting it out of clay and painting it. It was fun to try to get it to be recognizable even without the ability to add as much detail as I was wanting in my head. In the end, I liked the result and it felt more heartfelt than just printing something.
The next step was turning some brass to be the casing. I used my mini-lathe and some 1″ brass bar stock. This was straight forward.

Once I had the casing, I could then create the buck for the bullet. I used some poplar dowel and turned it, shaping it by hand. I filled the wood and sanded, painted, repeat until it was as smooth as I could get.

I used the buck to create a mold. I tried 2 part molding putty, but it was not very successful. I ended up with some weird voids and bubbles. I purchased some silicone mould maker and it was very effective. I ended up with zero voids, and it had a real nice finish.

Last I needed to cast the resin bullet. Thankfully I was smart enough to test this before committing my tiny gun. The first time, I didn’t follow the instructions. I ended up with lots of bubbles and some soft spots. The second time, I followed the instruction which indicated to heat the 2 resin parts prior to mixing. This improved the flow and reduced the number of bubbles.
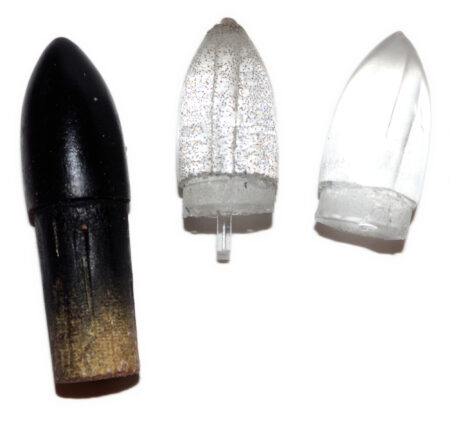
It still wasn’t what I hoped for, so the final step was to use my brother-in-law’s vacuum chamber to vacuum out the bubbles after mixing, but before pouring. I suspended the gun in the mold using acrylic rod and a jig. I let it cure, and was very happy with the result. After polishing and clear coating, it looked as good as I could have hoped for.
The next step was to meet Adam and give it to him. I’ve never been to a con before, so I didn’t know what to expect. I purchased a photo op beforehand thinking that would be the best way to meet him. I arrived about an hour before my appointment to look around, and figure out what the line situation was. I saw Adam at his table, but was afraid to approach as it seemed it was necessary to pay to either get an autograph or to take a selfie. Neither seemed appropriate since I was going to get a photo in just an hour, so I didn’t approach.
The photo-op experience was not what I was expecting. They funneled us into a big line, and they had us going in, getting a photo, and leaving all within seconds. I was able to say “Nice to meet you”, and then they snapped a photo, and I barely had time to say “May I give you a gift?” Adam was nice, and took it but didn’t have time to open it then. I was funneled out as quickly as I had come in. Apparently this is the nature of these photo-ops, and being a con-newbie, I had no idea.

(You can see the gift in my hand)

I was glad to have met him. I hope he is able to open the gift and appreciate it. He seemed like a lovely person. I hope someday I get to actually have a conversation with him.
More Thoughts on Lego

Quite a while back, I wrote about how much fun I was having with Lego Digital Designer (LDD). I was really pleased with that program, and have used it a lot (mostly to put together old sets from my childhood that I no longer have). Unfortunately Lego discontinued support in 2016. This wasn’t a huge deal at first; it just meant that new pieces weren’t being added. However, LDD for Mac is 32 bit, and Apple axed 32 bit support with the release of MacOS 10.15 Catalina. I actually abstained from upgrading to Catalina because of a few 32 bit apps, the most prominent of which was LDD. Eventually though, I had to upgrade and say goodbye to LDD.

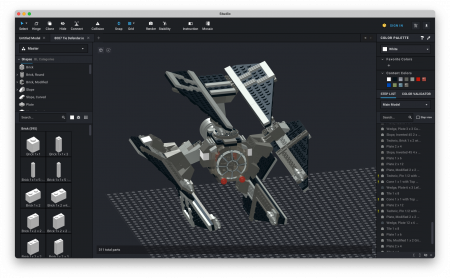
Luckily, I found a way to fill the Lego shaped void in my heart. I discovered a program called Studio. Studio is developed by the people at Bricklink. It is very similar to LDD, but it is actually much better. It uses the LDRAW library of pieces so it’s parts inventory is much more complete than LDD’s.

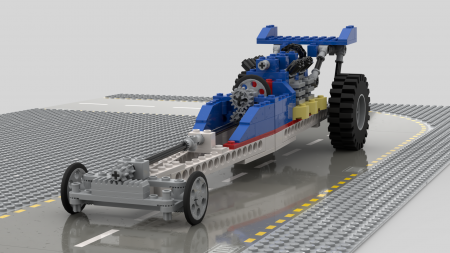
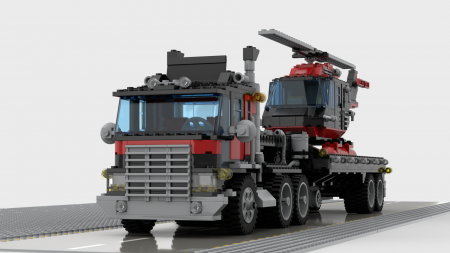
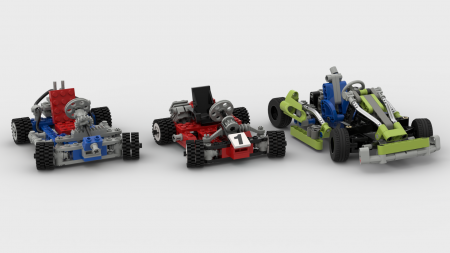
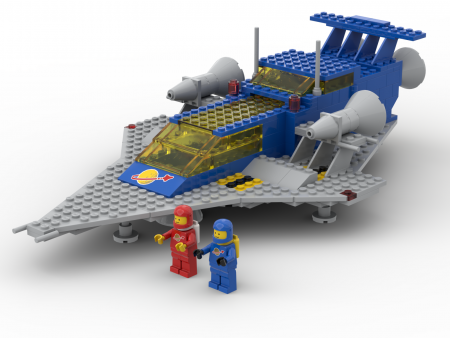
It has a built in render function for making photo-realistic images of your creations that looks amazing. It’s really easy to use, and turns out great results.

You can import the pieces from real Lego sets by entering in the set number. All the pieces you need will be placed knolled on the build field. This is great for people who want to build sets virtually, like me, or for people who like to make instruction for My Own Creations (MOCs) where alternative builds are made using the same pieces from a real Lego set.

Overall, I think that Studio is fantastic, and I am so glad to have it available to use.

Other Thoughts on Lego

Lego has gone through many different generations and has evolved a bit with each one. I think any given generation will say the sets they grew up with were “the best,” but I find people are always most sentimental for what they had when growing up. Obviously though, what I grew up with in the 90’s was the best.

Technic

I played with Lego a lot as a kid, and I would build all sorts of things. Though I made a lot of spaceships and cars, I feel like a bulk of my free play was inventing mechanical things with Technic bricks. I remember making arms, gearing system, levers, and all sorts of interesting things.

I now play Lego with my kids, and one thing I find is how much I struggle to make mechanical things using the current Technic bricks. The bricks I am used to were just regular bricks with holes in them. My Technic cars would be two 16 long Technic bricks spaced apart and held together by a couple plates. It was quick and easy to build something like that. The new generation of Technic bricks are completely smooth, and my brain just didn’t get wired for dealing with it. I find it much more limiting somehow and struggle to build some things that I feel should be simple.

Collectible Sets

Another thing that feels like it’s changed since the 90’s is the proliferation of licensed and collectible/limited sets. The first licensed Lego set was Luke’s X-Wing (7140) which was introduced in 1999. Up to this point all Lego sets were all based on internal Lego themes, like Pirates, City, Space, etc. The popularity of licensed sets grew during the 2000’s. There were (and still are) licensed themes like Harry Potter, Star Wars, Minecraft, and Disney. And with the proliferation of these licensed sets came the behavior of collecting. People (nerds) want to display their sets or collect all their favorite things from their beloved franchises.

The old way of Legoing seemed to be buy -> build -> play -> destroy. Now a common progression is to buy -> build -> display. I am definitely guilty of this too. I have the Grogu set and you can bet I’m not letting the pieces get mixed in with everything else because it was a limited set and builds something super specific.

I recently read a comment on Hacker News where someone was lamenting that Lego sets have become 3D puzzles rather than a play system, and that sentiment really resonated with me.

Highly Specialized Pieces

Lego introduces new parts every year. They always have, and they always will. I think it’s good for things to grow and evolve, however it also feels like adding more and more parts dilutes the abstractability of the medium. Making very specific parts to a set that can only be used in a single way feels like it works against the free-play mentality that one associates with Lego.

This though really isn’t as much of a problem as one might think. If you are free-building with Lego and have these pieces, you either find creative ways to use them, or you ignore them. It’s a non-issue, but something I see come up a lot in discussions of modern-day Lego.

In any case, Lego remains one of my favorite things to play with, whether physically or digitally. It can be an open landscape for your imagination, and I’m glad that it’s available for me and my children to enjoy.

Reflected Primary Colors

Eyes are interesting things. We have color receptors in our eyes tuned for three different wavelengths. Short (blue), medium (green), and long (red). Our brains combine this information and allow us to perceive millions of color, which is really just amazing.

These three colors are so important, that we specifically target them when we produce images on our monitors and TVs. All the images are made up of these three colors. Just as importantly, when we capture images with cameras, we actually filter the light going into the cameras into the three primary colors.

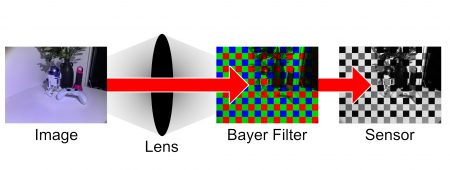
Camera image sensors aren’t inherently color sensitive. Each pixel we get out of a camera is actually made up from information gathered from 4 sub-pixels on the digital camera sensor. Each sub pixel has a filter in front of it for light to pass through; 1 Red, 1 blue, and 2 green. This is called the Bayer Filter. After the camera takes a picture or records a frame, the sub pixels get interpolated together to give a single pixel of data.

(It’s probably more nuanced than that, but that is the general idea)

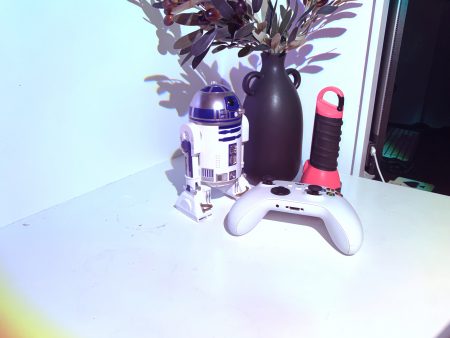
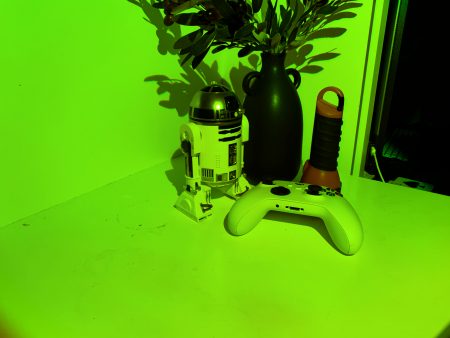
I recently purchased an RGB flashlight, and wondered how well I could reconstruct a color image by taking 3 photos illuminated with the different lights and combining them.

Ideally, I would like to try this using a black and white film camera, or black and white digital sensor, however I have access to neither, so I decided to use my iPhone.

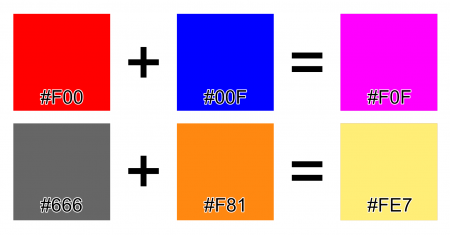
The first method I used was to take color photos with each illumination, and layer them on top of each other using the add blend mode. Using this blend mode adds the RGB values together. For example:

This method works well. It’s somewhat surprising considering that nothing I used was color calibrated.

The second method that I was more excited about was taking black and white photos of each and using those as the raw channel data to reconstruct the image.

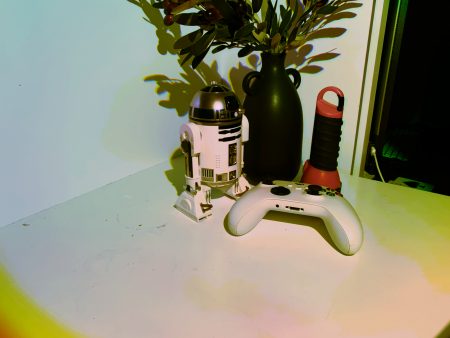
I took the photos on my iPhone while using the black and white filter mode. I then used Affinity Photo to import the photos and assign them to channels. The end result was abysmal.

I was able to improve it a bit by mixing the blue channel higher and reducing the intensity of the green channel.

Still not great.

I believe some of the problems are that the BW filter on the iPhone is not at all true black and white. I was surprised initially to find that the image wasn’t actually grayscale. It was RGB. I also don’t know how the image is being converted to black and white. It’s plausible that in the process of converting to grayscale, more red and blue data is thrown away in favor of green because it produces a better result to our eyes.

Although this was a bit of an interesting exercise, I think in the end it didn’t achieve great results because of the lack of true black and white sensor. The color results would have been more meaningful if it had been achieved without any color aware equipment.

Additionally, I’d be interested in comparing a composited photo using 3 exposures with red, green, and blue lights to a composited photo using 3 filters and white light. Someday I can revisit this experiment once I procure a proper camera.

© 2007-2015 Michael Caldwell